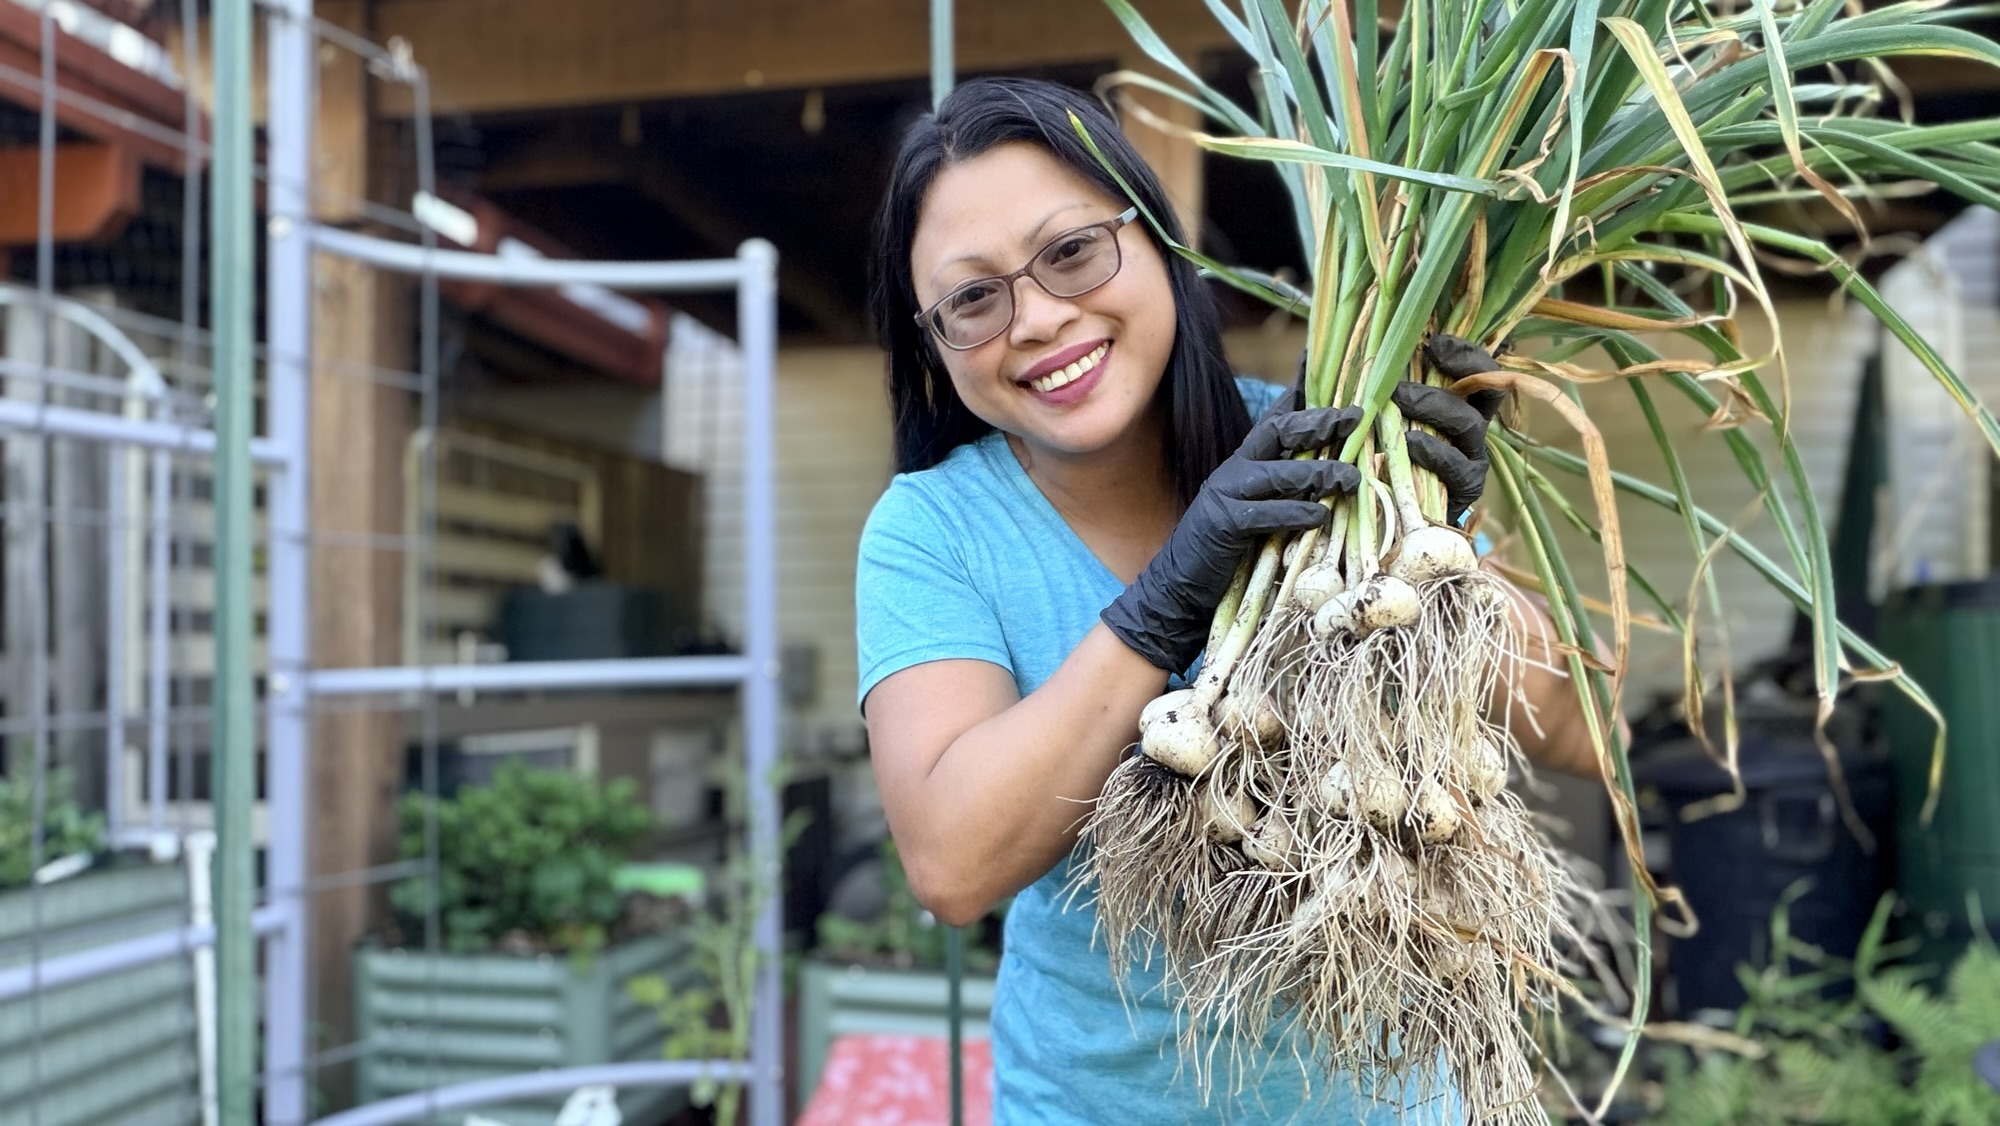
Garlic is one of the easiest crops to grow, but knowing when to harvest it can feel a little intimidating.
Harvest too early, and the bulbs may not reach their full size.
Wait too long, and the protective wrappers can split, reducing how long they’ll store.
Garlic gives you plenty of clues when it’s ready.
This year, I harvested my garlic gradually instead of pulling every bulb at once. Some plants matured earlier than others, so I let each one tell me when it was time. That simple change reminded me that gardening isn’t about following a calendar—it’s about paying attention to your plants.
If you’re wondering when to harvest garlic and what to do afterward, here’s the process I follow.
Don’t Harvest Garlic by the Calendar
One of the biggest mistakes new gardeners make is harvesting garlic on a specific date.
While most garlic is ready in early summer, the exact timing depends on your climate, variety, and growing conditions.
Instead, let the plants guide you.

I look for these signs:
- About one-third to one-half of the leaves have turned brown.
- Several healthy green leaves remain near the top.
- The bulbs feel full and well developed underground.
Those green leaves become the papery wrappers that protect the cloves during storage, so harvesting at the right time is important.
Rather than harvesting the entire bed at once, I prefer checking each plant individually.
Some bulbs mature a little earlier than others, even when they were planted on the same day.
How to Harvest Garlic
When a bulb is ready, avoid pulling it by the stem.


Instead, use a garden fork or hand trowel or simply pull the soil of the plant to loosen the soil several inches away from the bulb.
Carefully lift the garlic from underneath to avoid bruising or damaging it.
Once harvested:
- Shake off loose soil.
- Leave the leaves, roots, and stem attached.
- Don’t wash the bulbs.
The dirt can be brushed off after curing.
Adding moisture at harvest can increase the chance of mold or rot.
How to Cure Garlic
Fresh garlic isn’t ready for storage immediately after harvest. You can use some of them for cooking sooner but for better storage this step is important.
It first needs to cure.


Curing allows the outer wrappers to dry and the neck to seal, helping the bulbs store much longer.
I cure my garlic by laying it on a drying rack or hanging it in a shaded, dry, well-ventilated area.
Good airflow is essential.
Avoid placing garlic in direct sunlight, which can shorten its storage life.
Most garlic finishes curing in about two to four weeks, depending on humidity.
You’ll know it’s ready when:
- The neck feels completely dry.
- The roots become brittle.
- The outer wrappers feel papery.
Cleaning and Storing Garlic
Once cured, I trim the roots and cut the stalk about an inch above the bulb unless I plan to braid it.
Then I gently brush away any remaining soil.

For long-term storage, garlic likes conditions that are:
- Cool
- Dry
- Dark
- Well ventilated
I avoid storing garlic in sealed plastic bags because trapped moisture can encourage mold.
Instead, mesh bags, baskets, paper bags, or open crates allow plenty of airflow.
When stored properly, homegrown garlic can last for several months.
My Favorite Ways to Preserve Garlic
Besides storing whole bulbs, I like preserving garlic in several other ways.
Freeze Whole Cloves
Peel the cloves and freeze them in freezer-safe bags or containers.
They’re easy to grab whenever I’m cooking and work especially well in soups, sauces, and stir-fries.
Mince and Freeze
Another favorite method is chopping garlic and freezing it in small portions using silicone molds or ice cube trays.
Once frozen, I transfer the cubes to freezer bags so I always have ready-to-use garlic on hand.
Dehydrate Garlic
If I have smaller bulbs that won’t store as long, I like dehydrating them.
I slice the cloves thinly and dry them until crisp before grinding them into homemade garlic powder.
The flavor is incredible, and it’s a great way to reduce waste.
Save Your Best Bulbs
One thing I always do before putting my garlic away is set aside the best bulbs for planting.
I choose the healthiest, largest bulbs with well-formed cloves.

Saving your own seed garlic year after year can gradually improve your harvests while saving money on buying new seed garlic every fall.
Common Garlic Harvest Mistakes
If you’re harvesting garlic for the first time, here are a few mistakes to avoid:
- Harvesting too early before the bulbs have sized up.
- Leaving garlic in the ground too long after the wrappers begin splitting.
- Pulling bulbs by the stem instead of loosening the soil first.
- Washing freshly harvested garlic before curing.
- Storing garlic where there’s too much moisture or not enough airflow.
Avoiding these simple mistakes can make a big difference in how well your garlic stores.
Final Thoughts
Harvesting garlic is one of my favorite moments in the garden.
After months of waiting, there’s something incredibly satisfying about lifting beautiful bulbs from the soil and knowing they’ll flavor meals for months to come.
Learning when to harvest, how to cure the bulbs properly, and how to preserve them has helped me get the most from every garlic crop.
Whether you choose to store whole bulbs, freeze cloves, or make your own garlic powder, preserving your harvest means you can enjoy the fruits of your garden long after the growing season has ended.
And don’t forget to save a few of your best bulbs for planting in the fall. Your future garden will thank you.
Let’s Grow Together
Have you harvested your garlic yet?
I’d love to hear how your harvest turned out and how you like to preserve your homegrown garlic. Share your favorite tips, recipes, or storage methods in the comments below!
If you found this guide helpful, consider sharing it with another gardener or saving it for garlic harvest season. And if you enjoy practical gardening tips, seasonal growing guides, and real experiences from my Zone 7 garden, be sure to follow along for more.
This page contains affiliate links to my brand partners like Vego Garden, GreenStalk, Walmart & Amazon at no extra cost to you.
Your support helps me create free gardening content. Thank you!


Leave a Reply