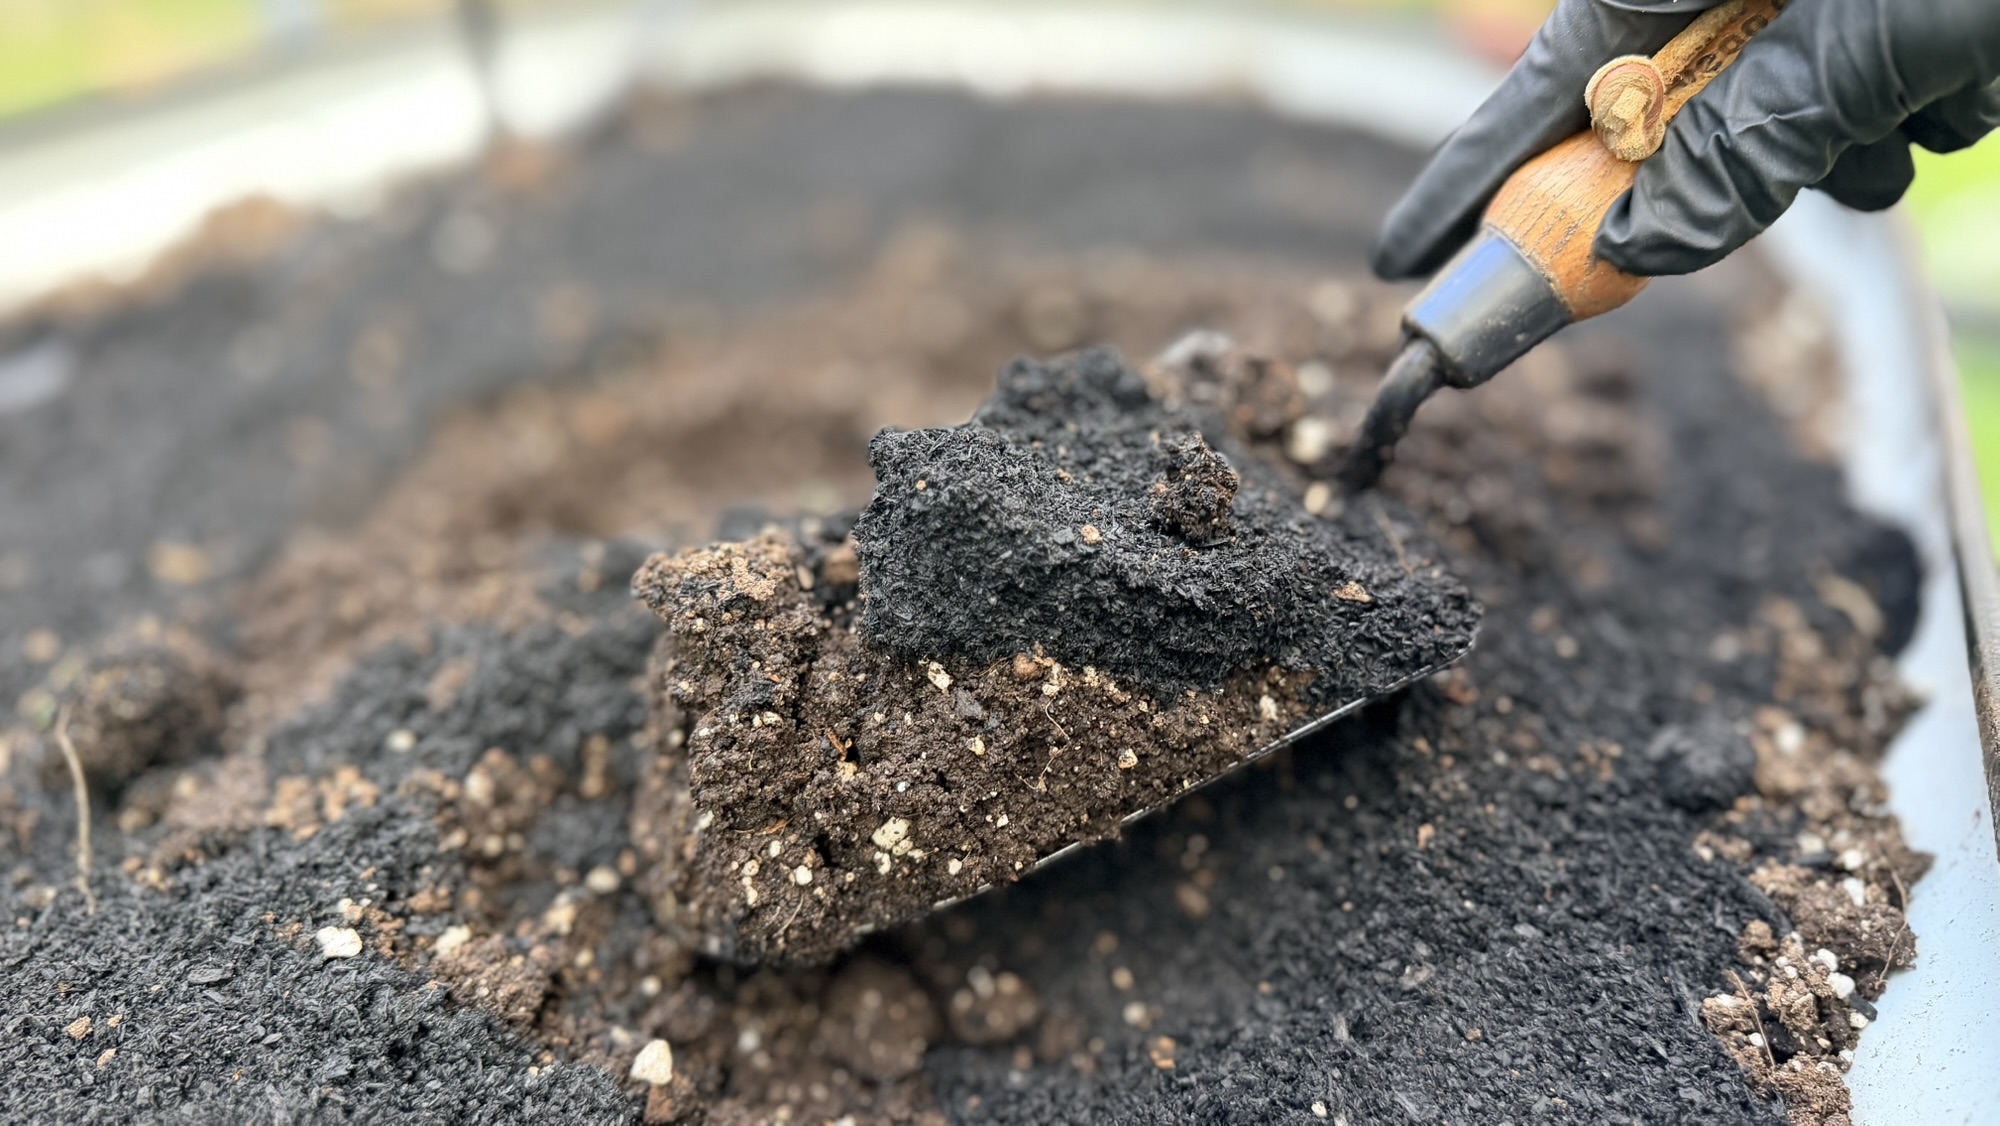
Your raised-bed soil usually doesn’t need to be replaced every year.
In most cases, you can refresh the soil you already have. This is important for beginner gardeners because filling a raised bed can be expensive. After investing time and money into your garden bed, you don’t want to empty it and start over every growing season.
You usually don’t have to.
After a season of growing vegetables, the soil level may drop. Organic matter decomposes, plants use nutrients, roots fill the bed, and the surface may become compacted.

That doesn’t necessarily mean the soil is bad. It means the soil needs maintenance.
I think of raised-bed soil as something I’m continually building, not something I use once and throw away.
Here’s how I refresh my raised-bed soil without replacing it.
Why Does Raised-Bed Soil Need to Be Refreshed?
A raised bed changes over time.
When you first fill it, the soil may be fluffy and level with the top of the bed. A year later, you may wonder where all the soil went.
It didn’t necessarily disappear. Organic materials decompose, soil settles, roots break down, and watering and weather contribute to compaction.
Vegetables also remove nutrients as they grow.
After one or more growing seasons, your soil may need additional organic matter, nutrients, volume, or simply some attention.
That’s normal.
Don’t Automatically Remove the Old Soil
When I refresh a raised bed, I don’t begin by removing everything. I want to preserve the soil I’ve already built.
Unless there’s a serious contamination, pest, disease, or other unusual problem that requires removing the growing medium, I work with what I already have.
Think about it this way: You don’t replace the soil in an in-ground garden every year. You maintain it. Raised beds can be managed the same way.
Build the soil. Feed it. Protect it. Keep using it.
Step 1: Remove Finished Plants
Start by removing plants that have finished producing, along with old stems, vines, fruit, weeds, and other unwanted debris.

You don’t necessarily need to pull out every root. If the plant was healthy and there are no root-related disease or pest concerns, you can cut it at soil level and leave the roots underground. They will eventually decompose and contribute organic matter.
Leaving healthy roots in place also causes less soil disturbance.
However, if a plant had a root disease, root-knot nematodes, or another root-related problem, remove and manage the affected material appropriately.
Step 2: Remove Diseased Plant Debris
Healthy and diseased plant material should not automatically be treated the same way.
If a vegetable was heavily affected by disease, remove the affected above-ground debris instead of incorporating it into the soil.
Try to identify the cause of the problem first. Not every yellow tomato leaf means the soil is contaminated. Plant problems can result from weather, watering, pests, nutrient issues, natural aging, or foliar diseases.
Don’t throw away your raised-bed soil because one plant struggled.
Figure out what happened first.
Step 3: Remove Weeds Before They Go to Seed
Remove weeds while cleaning the bed, especially mature weeds that may drop seeds into the soil.
Small, healthy weeds without mature seeds can often be composted. Be more cautious with weeds that have already gone to seed unless you know your composting method can handle them properly.
A few minutes of weeding now can save you a lot of work later.
Step 4: Check How Much the Soil Has Settled
Once the large plants are gone, check the actual soil level.
Raised-bed soil settling is normal. A bed that was originally filled close to the top may be several inches lower after a season or two.
Before adding more soil, ask why the level dropped. If the bed contained a lot of organic material, some of it may simply have decomposed.
That’s part of the process. You can restore the volume by adding more organic matter and, if necessary, additional raised-bed mix.
Step 5: Look at the Soil Before Adding Anything
Don’t immediately add every amendment recommended online. Look at the soil first.
Ask yourself:
- Is it compacted?
- Does water soak in easily?
- Does it stay waterlogged?
- Does it dry out unusually fast?
- Is there visible organic matter?
- Has the soil level dropped significantly?
- Did your plants grow well?
- Did multiple crops show similar problems?
- Have you been fertilizing regularly?
- When was the last time you added compost?
The answers will help you determine what the bed actually needs.
Amend with a purpose.
Step 6: Loosen the Surface If Needed
Raised-bed soil doesn’t need aggressive tilling every season. I prefer disturbing the soil as little as practical.
If the surface has become crusted or compacted, gently loosen the upper layer with a hand cultivator or garden fork. You’re not trying to turn the entire bed upside down. You’re simply creating a better surface for adding compost and planting.
If the soil already has good structure, leave it alone.
Step 7: Add Finished Compost
Finished compost is one of the most useful materials you can regularly add to a raised bed.
It contributes organic matter and nutrients while supporting the soil’s physical condition. Spread it over the bed and gently incorporate it into the upper layer, or use it as a topdressing.
You don’t need to replace the soil with compost.
Compost is an amendment, not necessarily the entire growing medium.
The amount you need depends on the condition of the bed, the compost you’re using, and what you plan to grow. More isn’t automatically better.
Step 8: Add Worm Castings If You Want To
Worm castings are another optional amendment. They can contribute organic matter and nutrients, but your raised bed won’t fail without them.
If you have worm castings available, mix some into the planting area or upper soil layer. Otherwise, focus on the basics.
Good soil management doesn’t require ten different bags of products.
Step 9: Add More Raised-Bed Mix If the Bed Needs Volume
Compost alone may not be enough if the soil level has dropped significantly.
In that case, add additional raised-bed mix or another appropriate soil blend. The goal is to restore volume while maintaining good structure.
You want a growing medium that can:
- Hold moisture
- Drain excess water
- Provide air around roots
- Support plant roots
- Hold and supply nutrients
Don’t fill the entire bed with compost. Use an appropriate raised-bed mix when several inches of material are needed.
Step 10: Fertilize According to What You’re Growing
Compost and fertilizer are not the same.
Compost contributes organic matter and varying amounts of nutrients. Fertilizer provides nutrients in more defined concentrations.
Depending on your soil and the next crop, you may need fertilizer in addition to compost. However, don’t automatically fertilize every bed simply because you’re refreshing it.
Think about what you’re planting. Leafy greens may have different fertility needs than tomatoes that grow and produce fruit for months.
Choose a product appropriate for the crop and follow the label.
More fertilizer isn’t always better.
Don’t Add Every Amendment at Once
It can be tempting to add compost, worm castings, bone meal, blood meal, biochar, azomite, fertilizer, and anything else in the garden shed.
But every raised bed doesn’t need every amendment every season.
For example, adding bone meal without knowing whether your soil needs more phosphorus can create a nutrient imbalance. The same principle applies to other amendments.
Know why you’re adding something before you add it.
Should You Add Bone Meal to Raised-Bed Soil?
Only if there’s a reason.
Bone meal is primarily used as a source of phosphorus and calcium, although the nutrient analysis varies by product.
If your soil already contains enough phosphorus, repeatedly adding bone meal may not help. A soil test can tell you whether additional phosphorus is needed.
Don’t assume every vegetable bed needs bone meal.
Should You Add Blood Meal?
Blood meal is a nitrogen-rich amendment, but that doesn’t mean every raised bed needs it.
Nitrogen can support leafy growth, but excessive nitrogen can create problems. If you’re already using compost and fertilizer, adding more nitrogen without a specific reason may be unnecessary.
Use amendments strategically.
What About Biochar?
Biochar can be part of a soil-management strategy, but it isn’t required for every garden.
If you use biochar, follow the product directions. Some products are pre-charged or blended with nutrients, while others need to be prepared differently before use.
Biochar is not a substitute for compost or proper fertility management. It’s simply another possible tool and normally once you add it, it stays in the soil unlike fertilizer that needed to be replenished after the growing season.
Do You Need to Add Perlite to a Raised Bed?
Not necessarily.
Perlite is commonly used in container potting mixes to improve aeration and drainage. Raised beds contain a much larger volume of soil and don’t automatically need perlite.
If your raised-bed soil drains well and has good structure, there’s no reason to add perlite simply because you use it in containers.
Raised-bed soil and container potting mix are not the same thing.
Should You Add Kitchen Scraps Directly to a Raised Bed?
You can compost organic material in place, but there’s a difference between building soil for later and planting immediately.
Fresh kitchen scraps need time to decompose. If an area won’t be planted right away, appropriate organic material can be buried or incorporated as part of an intentional in-place composting method.
However, if you plan to plant immediately, use finished compost instead. Fresh scraps can attract animals and pests, and tender roots shouldn’t grow directly through concentrated pockets of decomposing food.
For predictable results:
Use finished compost.
Can You Add Garden Debris Directly to Raised-Bed Soil?
I sometimes add fresh garden debris directly to my raised beds, but I’m intentional about how I do it. 🌱
I use small amounts of healthy plant material, chop it into smaller pieces, and bury it as deep as I reasonably can. If I plan to plant right away, I make sure there’s at least 6 inches of finished soil above the fresh material so I’m not planting directly into decomposing debris.
I especially like doing this when I’m planting something with relatively shallow roots.
One reason I do it is to encourage more biological activity in my raised beds. I have red wigglers living in the soil, and they help break down the buried organic matter. As they process it, their castings become part of the soil.
But there’s an important distinction: fresh garden debris is not the same as finished compost.
Fresh material still needs time to decompose. Adding too much can create an unstable planting zone as it breaks down, and the soil level can eventually sink.
So if I’m preparing a bed that will sit for a while, burying some healthy garden debris can be a useful way to recycle organic matter in place.
But if I’m planting tomorrow and want the simplest, most predictable option? Finished compost wins.
There’s more than one way to feed your soil—you just have to understand what you’re putting into it and give decomposition time to do its job.
Can You Plant Immediately After Refreshing Raised-Bed Soil?
Often, yes.
If you used finished compost, ready-to-use raised-bed soil, worm castings, or other amendments intended for immediate use, you can generally plant according to the product directions.
If you added fertilizer, follow the label. Some products are mixed into the soil at planting, while others have different instructions.
If you buried fresh kitchen scraps, unfinished compost, or a large amount of fresh plant debris, allow those materials time to decompose before planting directly into them.
If you needed planting space right away, bury the fresh kitchen scraps and/or garden debris as deep as possible and top it with at least 6 inches deep soil so the plant will have enough space to spread while the organic materials are still breaking down.
What you add and how you added it determines when you can plant.
Refreshing Raised-Bed Soil Between Summer and Fall Crops
This is one of the times I refresh my beds.
My summer and fall gardens often overlap. Tomatoes and peppers may still be producing in one part of the garden while I’m planting bok choy, lettuce, spinach, kale, and other cool-season vegetables elsewhere.
When a summer crop finishes, I don’t need to empty the entire bed. I can:
- Remove the finished plant.
- Remove weeds and unwanted debris.
- Assess the soil.
- Add finished compost if needed.
- Restore soil volume if necessary.
- Add fertilizer for the next crop if needed.
- Plant the fall vegetables.
The same raised bed can produce food through multiple seasons, which is especially valuable in a small garden.
You Can Refresh Part of a Bed
You don’t have to wait until an entire raised bed is empty.
If one tomato plant is finished but another is still producing, clean and refresh the available section. Then plant something new there.
This is one advantage of treating garden space as flexible. Just be careful not to damage the roots of plants you’re keeping.
Refreshing Soil Before Spring Planting
Spring is another good time to evaluate raised-bed soil.
Over winter, mulch may have decomposed and the soil may have settled. Before planting, check the condition of the bed.
If needed, add finished compost, restore lost volume, and fertilize according to what you’re growing.
You don’t need to rebuild the entire bed. You’re simply continuing the soil-maintenance process.
Should You Refresh Raised-Bed Soil in Fall or Spring?
You can refresh soil in either season.
In fall, you may be preparing a bed for another crop or protecting it for winter. In spring, you may be adding compost or other amendments before the main growing season.
You don’t need to perform a major soil overhaul twice a year. Observe the bed and respond to what it needs.
Should You Get a Soil Test?
If you’ve been growing in the same raised bed for several years, a soil test can be useful.
Testing is especially helpful if you’ve repeatedly added:
- Compost
- Fertilizer
- Manure
- Bone meal
- Lime
- Other nutrient amendments
It’s easy to assume garden soil is deficient in everything, but repeated amendments can cause certain nutrients to accumulate.
A soil test helps you make informed decisions about fertility and pH instead of guessing.
Don’t Automatically Add Lime
Lime raises soil pH, so it shouldn’t be added unless your soil needs a higher pH.
Testing is better than guessing. Amendments are not ingredients in a recipe where every bed receives the same list.
Your soil determines what your soil needs.
Don’t Throw Away Your Raised-Bed Soil
Unless there’s a serious reason to remove it, the soil already in your raised bed is a resource.
You’ve added organic matter, grown roots through it, watered it, fed it, mulched it, and built it over time.
Don’t assume the end of a growing season means all of that belongs in the trash.
Maintain it instead.
Should You Replace Raised-Bed Soil After a Diseased Plant?
Usually, one diseased plant doesn’t mean the entire bed needs to be emptied.
The correct response depends on the cause. Some problems affect leaves, some pathogens persist in plant debris or soil, and some issues aren’t infectious diseases at all.
If you experience a serious recurring problem, identify the cause before deciding what to do with the soil.
Replacing the entire bed without understanding the problem can be expensive and may not solve anything.
What About Soilborne Pests?
Soilborne pests require the same careful approach.
If you discover root-knot nematodes or another persistent soil-related pest, simply adding compost may not be enough.
Identify the pest and use management practices appropriate for that specific problem.
The advice in this article applies to normal raised-bed maintenance. Serious soilborne disease, contamination, or pest issues may require a different approach.
Mulch the Soil After Refreshing It
After refreshing a bed, I don’t like leaving the soil completely bare.
Organic mulch can help:
- Reduce moisture loss
- Moderate soil temperature
- Reduce erosion
- Suppress some weeds
- Protect the soil surface
- Add organic matter as it decomposes
Depending on the season and what I’m growing, I may use shredded leaves or another appropriate organic mulch.
Keep mulch away from small seedlings and avoid piling it tightly against plant stems.
Fall Leaves Are a Garden Resource
If you’re refreshing raised beds in fall, don’t overlook the leaves around you.
Dry leaves can become compost browns. Shredded leaves can be used as mulch, and whole leaves can be stored for later composting.
Instead of treating every fall leaf as yard waste, consider how it can help build your garden soil.
Free organic material is valuable.
Protect Empty Beds Over Winter
If you’re not planting after refreshing the soil, protect the bed instead of leaving the surface bare.
Depending on your garden plan, you might use:
- Organic mulch
- Shredded leaves
- An appropriate cover crop
- Another suitable soil-covering method
The goal is to protect the soil until you’re ready to grow again.
An empty bed doesn’t need to become an exposed bed.
What About Cover Crops?
Cover crops can help protect an empty raised bed, contribute organic matter, and provide other soil-building benefits.
However, they aren’t mandatory.
If you’re a beginner and cover cropping feels like one more task, mulch is a perfectly reasonable place to start.
You don’t need to use every gardening technique at once.
Don’t Forget About Crop Rotation—but Keep It Practical
Crop rotation can help manage certain pests, diseases, and nutrient demands.
However, perfect multi-year rotation isn’t always realistic in a small raised-bed garden. You may not be able to move a tomato bed far away the following year.
Think of rotation as one useful tool rather than an impossible rule.
When possible, vary plant families and avoid repeatedly growing susceptible crops in the same location if you’ve had a specific soilborne pest or disease problem.
But don’t let perfect rotation stop you from gardening in a small space.
How Often Should You Add Compost to Raised Beds?
There isn’t one schedule that works for every garden.
Some gardeners add compost annually. Others add smaller amounts between crops.
The amount and frequency depend on:
- Your existing soil
- The compost you’re using
- How intensively you grow
- How much the bed settles
- What you’re planting
- Your other fertility practices
Because I grow food through multiple seasons, I pay attention to my beds throughout the year instead of assuming they only need attention once.
Observe first. Amend second.
How Much Compost Should You Add?
There’s no universal amount every raised bed needs.
If you’re maintaining a productive bed, a surface layer of finished compost may be enough. If the soil has settled dramatically, you’ll probably need additional raised-bed mix rather than trying to replace several inches of missing volume with compost alone.
The goal is to maintain a balanced growing medium, not turn the entire bed into pure compost.
A Simple Raised-Bed Soil Refresh Routine
If your raised-bed soil is generally healthy and you’re preparing it for another crop, keep the process simple.
1. Remove finished plants
Leave healthy roots where appropriate, or remove root systems when there’s a pest or disease reason to do so.
2. Pull weeds
Remove weeds before they produce and spread mature seed.
3. Inspect the soil
Check the structure, drainage, moisture, soil level, and performance of the previous crop.
4. Gently loosen compacted areas if needed
Don’t aggressively till the entire bed just because you’re refreshing it.
5. Add finished compost
Use it to replenish organic matter.
6. Restore lost soil volume if necessary
Add an appropriate raised-bed mix when the bed has settled significantly.
7. Add amendments only when needed
Don’t automatically add every product in your garden shed.
8. Fertilize for the next crop if appropriate
Follow the product directions.
9. Plant your next vegetables
Or protect the soil if the bed will remain empty.
10. Mulch
Keep the soil covered where appropriate.
That’s it.
Refreshing raised-bed soil doesn’t need to become a complicated annual project.
Building Healthy Soil Is a Gardening Habit
The biggest shift for me has been thinking about soil care as an ongoing habit.
I don’t wait until the soil is in terrible condition and then try to fix everything at once. I add compost, compost garden debris, use mulch, leave healthy roots when appropriate, pay attention to drainage, fertilize according to what I’m growing, and avoid unnecessary soil disturbance.
None of these actions is dramatic, but small habits add up over time.
Healthy soil isn’t something you buy once. It’s something you continue to build.
Don’t Replace It. Take Care of It.
If your raised-bed soil looks tired after a long growing season, don’t assume you need to start over.
Maybe the bed needs compost. Maybe it needs more soil because the level has settled. Maybe the next crop needs fertilizer. Maybe the surface needs mulch. Maybe it doesn’t need much at all.
Start by looking at what you already have.
Your soil is one of the most valuable resources in your garden. Take care of it, keep building it, and let it support season after season of growing food.
Don’t replace your raised-bed soil just because it’s old. Refresh it and keep it working.
Let’s grow food at home.
Frequently Asked Questions
Do you need to replace raised-bed soil every year?
No. Raised-bed soil can usually be maintained for many growing seasons. Add organic matter, restore lost volume, fertilize when appropriate, and address specific soil problems instead of replacing everything automatically.
What should I add to old raised-bed soil?
It depends on what the soil needs. Finished compost is commonly useful for adding organic matter. You may also need additional raised-bed mix if the soil level has dropped, along with fertilizer if your next crop requires nutrients.
Avoid adding amendments without a reason.
Why does the soil level in my raised bed keep dropping?
Organic components decompose and soil settles over time, so some loss of volume is normal. Roots and other organic materials also break down.
Top up the bed with appropriate materials as needed.
Can I plant immediately after refreshing raised-bed soil?
Often, yes, if you’ve used finished compost and ready-to-use soil amendments. Follow fertilizer labels.
If you’ve added fresh kitchen scraps, unfinished compost, or substantial fresh plant material, allow time for decomposition before planting directly into that material.
Should I till my raised-bed soil every year?
Usually, aggressive annual tilling isn’t necessary. If the surface is compacted, gently loosening it may help. Otherwise, minimizing unnecessary disturbance can preserve soil structure.
Should I add compost every year?
Many gardeners add compost regularly, but the amount and frequency depend on your soil, growing intensity, compost, and fertility program.
Observe the soil and consider testing it periodically rather than assuming more compost is always better.
Should I add fertilizer when refreshing raised beds?
Not automatically. Consider what you’re planting and what your soil already contains.
If fertilizer is needed, choose an appropriate product and follow the label instead of applying extra nutrients simply because you’re refreshing the bed.
Should I remove old roots from a raised bed?
Not always. Healthy roots can often remain and decompose in place.
Remove roots when they’re associated with a root-related disease, persistent pest, or another problem that makes leaving them undesirable.
Can I reuse raised-bed soil after tomatoes?
Usually, yes. Growing tomatoes doesn’t automatically ruin the soil.
Remove finished plant material, evaluate the soil, replenish organic matter and nutrients as needed, and consider the disease history when deciding what to plant next.
Related Articles
● Compost vs. Fertilizer: What’s the Difference?
● Organic Gardening for Beginners
● How to Grow Healthy Vegetables at Home
● Fall Vegetable Gardening for Beginners: How to Start a Fall Garden



Leave a Reply