Fresh herbs are one of the greatest rewards of a home garden. Whether you’re snipping basil for pasta, cilantro for tacos, parsley for soup, or chives for scrambled eggs, there’s nothing quite like cooking with herbs you’ve grown yourself.
The challenge is that herbs often produce more than we can use while they’re at their peak.

Fortunately, freezing is one of the easiest ways to preserve their fresh flavor. While frozen herbs won’t have the same texture as freshly picked ones, they retain much more of their flavor than many people expect and are perfect for cooked dishes throughout the year.
In my garden, freezing herbs is one of my favorite ways to reduce waste. Instead of watching extra herbs flower or spoil in the refrigerator, I preserve them while they’re still fresh so I always have homegrown herbs ready to use.
Here’s how to freeze herbs without losing their wonderful flavor.
Why Freeze Herbs?
Freezing is quick, simple, and preserves much of an herb’s natural flavor.
Benefits include:
- Preserves fresh garden herbs for months
- Reduces food waste
- Saves money
- Makes meal preparation faster
- Requires very little equipment
- Helps you enjoy summer herbs during winter

Frozen herbs are especially useful in soups, stews, sauces, casseroles, stir-fries, marinades, and cooked vegetables.
Which Herbs Freeze Best?
Many herbs freeze exceptionally well.
Some of the best include:
- Parsley
- Cilantro
- Dill
- Chives
- Basil
- Oregano
- Thyme
- Sage
- Tarragon
- Lemon balm
- Mint
Woody herbs like rosemary and thyme also freeze well, although they can simply be stored as whole sprigs.
Harvest Herbs at the Right Time
For the best flavor, harvest herbs:
- Early in the morning
- After the dew has dried
- Before the plants flower whenever possible
This is when their essential oils—and therefore their flavor—are often at their highest.
Choose healthy, undamaged leaves without signs of disease or insect damage.
Wash and Dry Thoroughly
Before freezing:
- Rinse herbs gently under cool water.
- Remove dirt and insects.
- Pat dry with clean towels.
- Allow them to air dry completely.
Removing excess moisture helps reduce ice crystals and freezer burn.
A salad spinner works well for leafy herbs such as parsley and cilantro.
Remove Tough Stems
Most herbs freeze best after removing thick stems.
For example:
- Strip parsley leaves from large stems.
- Remove basil leaves from thick stems.
- Snip chives into usable pieces.
- Remove cilantro leaves and tender stems if desired.
Tender stems on herbs like cilantro, parsley, and dill are perfectly edible and may also be frozen.
Method 1: Freeze Herbs in Freezer Bags
This is the simplest method.
- Chop the herbs if desired.
- Place them in freezer bags.
- Remove as much air as possible.
- Seal tightly.
- Freeze flat.
Once frozen, simply break off the amount you need.
This works well for:
- Parsley
- Cilantro
- Chives
- Dill
Method 2: Freeze Herbs in Cube Trays or Portion Sizes
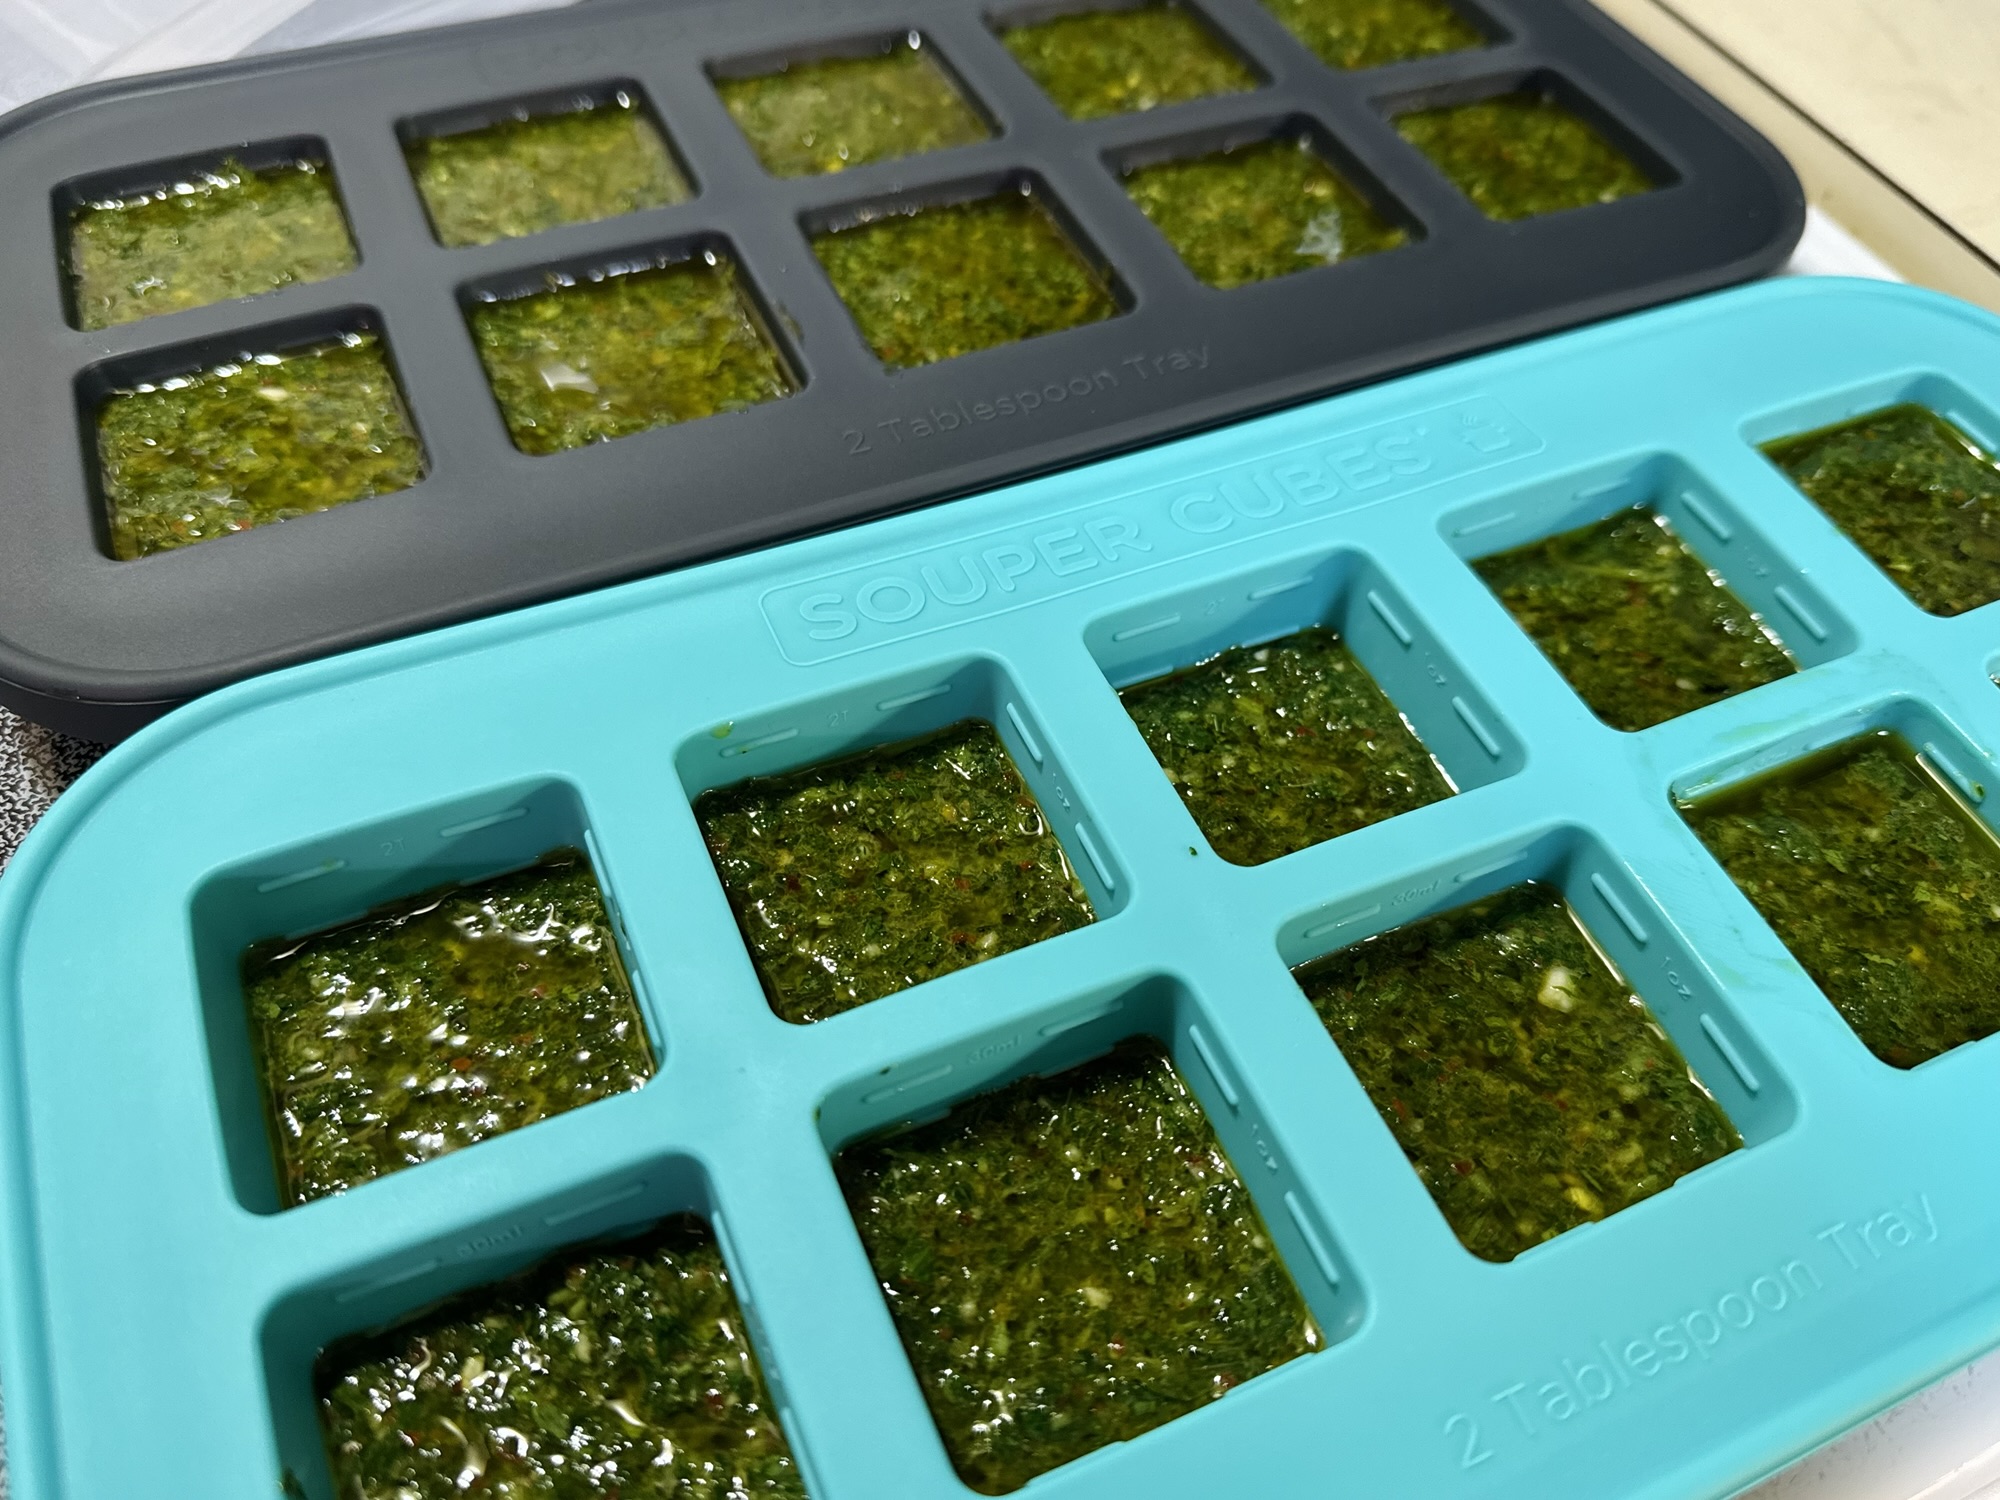
One of the most popular methods is freezing herbs in ice cube trays. I like using Souper Cubes tray for this method.
Steps:
- Chop the herbs.
- Fill each cube about halfway.
- Cover with water or olive oil.
- Freeze.
- Transfer cubes to freezer bags once solid.

These cubes are perfect for:
- Soups
- Sauces
- Stews
- Pasta dishes
Simply drop a cube directly into your cooking.
Water or Olive Oil?
Both methods work well.
Water
Best for:
- Soups
- Broths
- Stews
Olive Oil
Best for:
- Pasta
- Sautéing
- Roasted vegetables
- Marinades
- Sauces

Keep in mind that olive oil cubes should remain frozen until you’re ready to use them.
Method 3: Freeze Whole Leaves
Some herbs freeze well without chopping.
Examples include:
- Sage
- Bay leaves
- Mint
- Rosemary
- Thyme
- Cilantro
Arrange the leaves or sprigs on a baking sheet.
Freeze them until solid.
Then transfer them to freezer bags.
This flash-freezing method keeps them from sticking together.
Method 4: Make Herb Butter
Herb butter freezes beautifully.
Simply combine:
- Softened butter
- Chopped herbs


Popular combinations include:
- Garlic and parsley
- Chives
- Dill
- Basil
Roll into a log or portion into small containers before freezing.
Slice off only what you need.
Method 5: Herb Pesto
Basil isn’t always the best herb to freeze by itself because the leaves darken after thawing.
One of the best ways to preserve basil is by making pesto.
Freeze pesto:
- In silicone trays, like Souper Cubes
- In ice cube trays

Small portions make it easy to add garden flavor to meals all year.
Best Herbs for Each Method
Freezer Bags
- Parsley
- Cilantro
- Chives
- Dill
Ice Cube Trays
- Basil
- Parsley
- Cilantro
- Dill
- Chives
Whole Sprigs
- Rosemary
- Thyme
- Sage
- Cilantro
Pesto
- Basil
Herb Butter
- Chives
- Dill
- Parsley
- Sage
Label Everything
Always write:
- Herb name
- Date frozen
Many herbs look surprisingly similar after freezing.
A permanent marker prevents confusion later.
How Long Do Frozen Herbs Last?
For the best quality:
- Use within 6 to 12 months
They often remain safe longer if kept continuously frozen.
Flavor gradually declines over time.
Should You Thaw Frozen Herbs?
Usually, no.
Most herbs can go directly from the freezer into:
- Soups
- Sauces
- Stir-fries
- Pasta
- Eggs
- Roasted vegetables
For fresh salads or garnishes, use freshly picked herbs instead.
Frozen herbs become soft after thawing.
Which Herbs Don’t Freeze as Well?
While most herbs freeze successfully, delicate herbs used primarily for fresh texture may not look their best after thawing.
Examples include:
- Basil (unless made into pesto)
- Tender mint leaves for garnish
These herbs still retain excellent flavor for cooked dishes.
Freezing Individual Herbs
Parsley
One of the easiest herbs to freeze.
Use:
- Chopped
- Whole leaves
- Ice cube trays
Cilantro
Freeze chopped leaves and tender stems.
Excellent for soups, curries, and cooked sauces.
Chives
Simply snip into small pieces and freeze.
No blanching required.


Dill
Freeze whole fronds or chop before freezing.
Perfect for soups, potatoes, and seafood dishes.
Basil
Freeze:
- Whole leaves
- Chopped
- Pesto
- Olive oil cubes
Pesto usually gives the best flavor and color.
Rosemary
Freeze entire sprigs.
Remove the needles as needed while cooking.
Thyme
Freeze whole sprigs or strip the leaves first.
Sage
Freeze whole leaves or chop before freezing.
Excellent for roasted vegetables and poultry dishes.
Mint
Freeze whole leaves or chopped portions.
Best used in teas, desserts, sauces, and cooked recipes.
Common Freezing Mistakes
Freezing Wet Herbs
Extra moisture creates ice crystals.
Dry herbs thoroughly first.
Using Thin Storage Bags
Use freezer-grade bags whenever possible.
Forgetting Labels
Label every package.
Keeping Herbs Too Long
Even frozen herbs gradually lose flavor.
Rotate older herbs first.
Expecting Fresh Texture
Frozen herbs keep their flavor much better than their texture.
Plan to use them in cooked dishes.
My Favorite Herbs to Freeze
Every growing season I end up freezing several herbs from my garden.
The ones I preserve most often are:
- Basil
- Parsley
- Cilantro
- Chives
Having them ready in the freezer makes weeknight cooking much easier, especially during winter when fresh garden herbs aren’t available.
I love being able to add homegrown flavor to soups, stir-fries, sauces, and egg dishes months after the gardening season has ended.
Herb Freezing Checklist
- Harvest herbs before flowering.
- Pick in the morning.
- Wash gently.
- Dry completely.
- Remove thick stems.
- Choose your preferred freezing method.
- Remove excess air from containers.
- Label everything.
- Freeze promptly.
- Use within one year for the best flavor.
Final Thoughts
Freezing herbs is one of the easiest ways to preserve the flavors of your garden.
Whether you freeze chopped parsley in a bag, basil pesto in cubes, or rosemary sprigs whole, you’ll be glad to have homegrown herbs ready whenever you need them.
While the texture changes after freezing, the flavor remains excellent for cooking, making freezing an easy, practical way to enjoy your harvest all year long.
Frequently Asked Questions
Do I need to blanch herbs before freezing?
No. Most herbs freeze well without blanching. Simply wash, dry, and freeze them.
Can I freeze herbs whole?
Yes. Herbs such as rosemary, thyme, sage, and mint freeze well as whole sprigs or leaves.
Should I freeze herbs in water or olive oil?
Both work well. Water is ideal for soups and stews, while olive oil is excellent for sautéing, sauces, and roasted vegetables.
Can frozen herbs be used as garnishes?
Not usually. Frozen herbs lose their crisp texture and are best used in cooked dishes.
How long do frozen herbs last?
For the best quality, use frozen herbs within 6 to 12 months.
Which herb freezes the best?
Parsley, cilantro, dill, and chives are among the easiest herbs to freeze while maintaining excellent flavor.
Related Articles
- How to Freeze Fresh Vegetables
- How to Dehydrate Herbs at Home
- The Best Way to Store Fresh Herbs
- Freezing vs. Dehydrating: Which Is Better?
- How to Preserve Ginger
- How to Preserve Turmeric
- How Long Do Homegrown Vegetables Last?
- How to Build a Pantry From Your Garden
- My Favorite Food Preservation Tools
This page contains affiliate links to my brand partners like Vego Garden, GreenStalk, Walmart & Amazon at no extra cost to you.
Your support helps me create free gardening content. Thank you!



Leave a Reply