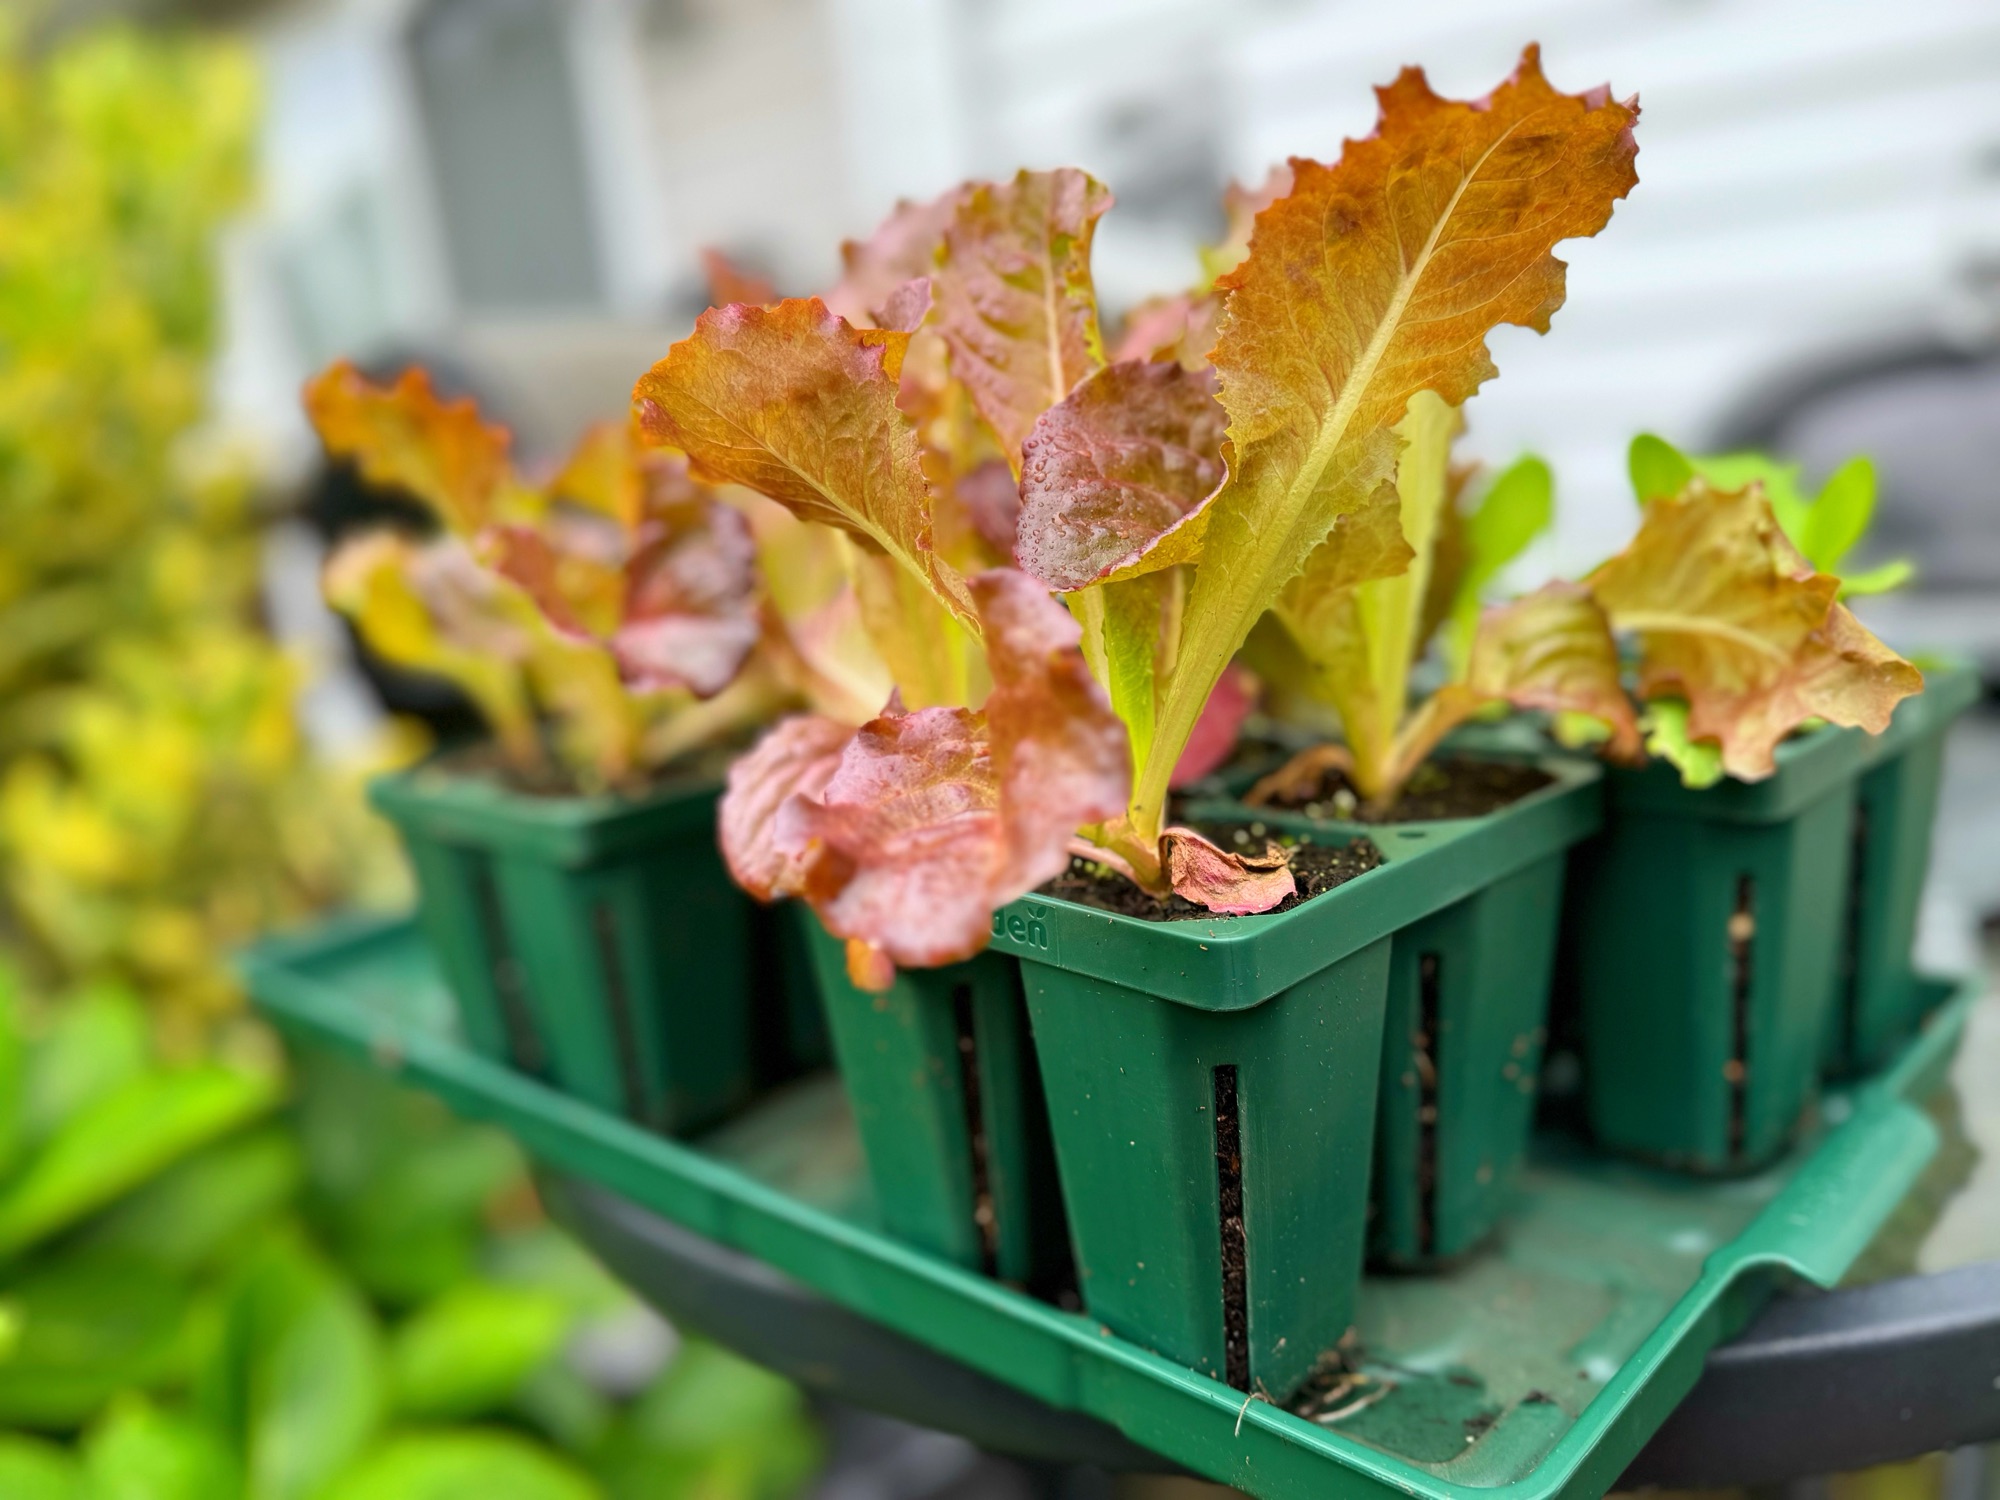
Starting a fall vegetable garden often feels a little backward.
You are planting cool-season crops such as lettuce, spinach, bok choy, kale, broccoli, and cabbage during some of the hottest weeks of the year. The plants may be intended for crisp autumn weather, but first they must survive intense sun, warm soil, drying winds, and temperatures that can climb into the 80s or 90s.
That early heat can be one of the most challenging parts of fall gardening.

Seeds may fail to germinate. Newly transplanted seedlings may wilt within hours. Small plants can dry out before their roots have time to become established.
Fortunately, you do not have to wait until the weather feels like fall to begin planting. With shade, consistent moisture, careful timing, and a little patience, fall seedlings can become established even while summer is still in full swing.
In my Maryland Zone 7 garden, I often start fall crops while tomatoes, peppers, cucumbers, and other summer vegetables are still producing. The transition can be tricky, but protecting those first seedlings gives them enough time to grow before shorter days and colder temperatures arrive.
Here is how to help your fall seedlings survive the summer heat.
Why Fall Seedlings Struggle in Summer
Cool-season vegetables are adapted to mild temperatures.
When planted during hot weather, they may experience:
- Rapid moisture loss
- Hot soil
- Leaf scorch
- Transplant shock
- Poor germination
- Weak root development
- Premature bolting
- Increased pest pressure
Young seedlings are especially vulnerable because their root systems are small and shallow.
A mature kale plant may tolerate a warm afternoon, but a newly transplanted kale seedling can dry out quickly if its roots have not yet spread into the surrounding soil.
The goal is not to create cold conditions. It is to reduce stress long enough for the plants to establish.
Start at the Right Time
Timing is one of the most important parts of fall gardening.
If you wait for cool weather before starting, many crops will not have enough time to mature before daylight decreases and hard freezes arrive.
In Zone 7, fall planting often begins in late July or August for longer-season vegetables such as:
- Broccoli
- Cabbage
- Cauliflower
- Kale
- Collards
- Brussels sprouts
Faster crops can be planted later, including:
- Lettuce
- Spinach
- Radishes
- Arugula
- Bok choy
- Mustard greens
- Turnips
- Cilantro
Check each variety’s days to maturity and count backward from your average first frost date. Add extra time because growth slows as the days become shorter.
Choose Heat-Tolerant Varieties
Not all cool-season varieties respond to heat in the same way.
When planting for fall, look for varieties described as:
- Heat tolerant
- Slow bolting
- Suitable for summer sowing
- Fast maturing
- Recommended for fall production
This is especially helpful for lettuce, spinach, bok choy, broccoli, and cauliflower.
A heat-tolerant variety will still need care, but it may handle late-summer conditions better than one bred only for cool spring weather.
Start Heat-Sensitive Seeds Indoors
Some seeds germinate poorly when the soil is too warm.

Lettuce and spinach are two common examples.
Instead of repeatedly sowing them into hot garden soil, start them:
- Indoors under grow lights
- In a cool room
- In seed trays on a shaded porch
- In containers that can be moved as needed
Starting seeds in a controlled environment allows you to manage moisture and temperature more easily.
Once the seedlings are established, gradually introduce them to outdoor conditions before transplanting.
Use a Shaded Outdoor Seed-Starting Area
Not every seed needs to be started inside the house.
A shaded patio, covered porch, or sheltered area can work well for starting fall seedlings, especially when indoor space is limited.

The area should receive:
- Bright indirect light
- Some morning sun if temperatures are mild
- Protection from intense afternoon sun
- Good airflow
- Easy access to water
Avoid very dark locations. Seedlings that do not receive enough light may become thin and leggy.
Once seeds germinate, move them gradually into brighter conditions so they grow strong without being scorched.
Keep Seed-Starting Mix Consistently Moist
Small seed-starting cells and pots can dry out quickly in summer.
Check them at least once a day and more often during very hot or windy weather.
The mix should remain:
- Evenly moist
- Never completely dry
- Not constantly waterlogged
Bottom watering can help keep moisture more consistent while reducing disturbance to tiny seedlings.
Place the seed tray in a shallow container of water and allow the mix to absorb moisture from below. Remove the tray once the surface feels evenly damp.
Do not leave containers sitting in water for long periods, as constantly saturated roots may rot.
Direct Sow in the Evening
When sowing seeds directly in the garden, plant in the late afternoon or evening.
This gives the seeds and soil several cooler hours before the next day’s sun arrives.
Before sowing:
- Water the planting area thoroughly.
- Allow excess water to drain.
- Sow the seeds at the recommended depth.
- Cover lightly with soil.
- Water gently again.
Morning planting can also work on a cloudy day, but avoid sowing immediately before the hottest part of the afternoon.
Cool the Soil Before Planting
Hot, dry soil can reduce germination.
Water the planting area deeply a day before sowing. This helps lower the soil temperature and provides moisture beneath the surface.
You can also shade the area for several days before planting using:
- Shade cloth
- Cardboard held above the soil
- A lightweight board
- An empty garden tray
- Existing plant foliage
Do not leave solid covers pressed against wet soil for too long, as they can limit airflow and encourage fungal problems.
Keep the Seedbed Moist Until Germination
Seeds must absorb moisture before they can germinate.
If the soil dries out after that process begins, the seed may die.
During hot weather, the top layer of soil can dry within hours. Newly seeded areas may need light watering once or twice a day, depending on the weather and soil type.
Use a gentle spray so you do not:
- Wash seeds away
- Create deep holes
- Compact the soil
- Expose tiny roots
Once seedlings emerge and develop deeper roots, transition to less frequent but deeper watering.
Use Temporary Covers to Hold Moisture
For small seeded areas, a temporary cover can help prevent the soil surface from drying too quickly.
Possible covers include:
- A piece of cardboard
- A wooden board
- Burlap
- Lightweight fabric
- A seed-starting humidity cover
Check beneath the cover every day.
Remove it as soon as the first seedlings begin emerging. Leaving it in place after germination can block light and cause weak, pale growth.
This technique is especially helpful for small seeds that must remain close to the soil surface.
Protect Seedlings With Shade Cloth
Shade cloth is one of the most useful tools for fall gardening during summer heat.
It reduces the intensity of direct sunlight while allowing air and rain to reach the plants.
For most vegetables, a lighter shade cloth is usually better than very dense material. The goal is to soften the sun, not place the seedlings in darkness.
Install the cloth above the plants using:
- Garden hoops
- Stakes
- A simple frame
- An existing trellis
- Clips or clothespins

Keep the material from resting directly on tender leaves whenever possible.
Focus Shade on the Afternoon Sun
Morning sunlight is generally gentler than afternoon sun.
When possible, position shade cloth so it protects seedlings during the hottest part of the day while allowing them to receive morning light.
This gives plants enough light for healthy growth without exposing them to the most intense heat.
You can sometimes achieve this by shading only the western side of a bed rather than covering the entire garden.
Use Summer Crops as Living Shade
Existing summer plants can create useful temporary protection.
Young fall seedlings may be planted near:
- Tomato plants
- Pepper plants
- Trellised cucumbers
- Pole beans
- Okra
- Tall flowers
These established plants can provide dappled or afternoon shade while the seedlings become established.
As fall approaches and the sun becomes less intense, remove finished summer plants to give the new crops more light and space.
Be careful not to place seedlings so close that they must compete heavily for water or nutrients.
Transplant in the Evening
If you are moving seedlings into the garden, transplant late in the day.
Evening transplanting gives the plants time to recover overnight before facing direct sun.
Avoid transplanting:
- During the hottest part of the day
- Immediately before a heat wave
- Into dry soil
- On very windy days
A cloudy or lightly rainy day can also provide good transplanting conditions, as long as the soil is not waterlogged.
Water Before and After Transplanting
Dry root balls do not transplant well.
Water seedlings thoroughly before removing them from their containers.
Then:
- Water the planting hole.
- Place the seedling at the correct depth.
- Firm the soil gently around the roots.
- Water again after planting.
This helps settle the soil and eliminates large air pockets around the roots.
For the first week, check the soil frequently. Newly transplanted seedlings may need more frequent watering than established plants.
Harden Seedlings Off Gradually
Seedlings started indoors or in deep shade should not be moved directly into full summer sun.
They need time to adjust to:
- Brighter light
- Wind
- Heat
- Outdoor temperature fluctuations
- Faster moisture loss
Begin with a short period outdoors in shade, then gradually increase their exposure over several days.
During hot weather, hardening off may take longer because the change between indoor conditions and the garden is more extreme.
If plants begin wilting heavily or developing bleached patches, move them back into shade and progress more slowly.
Provide Temporary Shade After Transplanting
Even hardened seedlings may benefit from shade during their first few days in the garden.
You can use:
- Shade cloth
- Upside-down crates
- Garden chairs
- Lightweight fabric
- Cardboard supported by stakes
- Large containers positioned to block afternoon sun
Make sure the cover does not trap heat or crush the plant.
Remove temporary protection gradually as the seedling begins producing new growth.
Water Deeply but Avoid Constantly Soggy Soil
Fall seedlings need consistent moisture, but excessive watering can be just as damaging as drought.
Water when the soil begins drying near the surface, then soak deeply enough to reach the root zone.
The exact frequency depends on:
- Temperature
- Wind
- Soil type
- Container size
- Rainfall
- Mulch
- Plant maturity
Raised beds and containers may need water more often than in-ground gardens.
Always check the soil before watering instead of relying on a fixed schedule.
Water in the Morning When Possible
Morning watering allows plants to absorb moisture before the heat of the day.
It also gives wet leaves time to dry, reducing the risk of some diseases.
If seedlings are visibly wilting or the soil is dangerously dry, water them immediately rather than waiting until morning.
During extreme heat, a second light watering near the soil may be needed in the late afternoon.
Avoid repeatedly wetting the foliage at night.
Mulch After Seedlings Are Established
Mulch helps keep soil cooler and reduces moisture loss.
Good options include:
- Shredded leaves
- Straw
- Fine wood mulch
- Untreated grass clippings applied thinly
- Compost
Wait until seedlings are visible and established before applying mulch around them.
Keep mulch away from the stems to reduce the risk of rot and avoid burying tiny plants.
Do not place a thick layer directly over rows of newly sown seeds.
Give Seedlings Enough Space
Crowded seedlings compete for water, nutrients, airflow, and light.
Thin direct-sown crops once they are large enough to handle.
Follow the recommended spacing for the size you plan to harvest.
For example:
- Baby greens can grow closer together.
- Full-sized cabbage and broccoli need much more space.
- Bok choy spacing depends on whether you want baby or mature heads.
Proper spacing also makes it easier to water, inspect for pests, and cover plants with netting.
Avoid Fertilizing During Extreme Heat
Newly transplanted seedlings are already under stress.
Strong fertilizer applications can damage tender roots, especially when the soil is dry or temperatures are high.
Prepare the bed with compost before planting, then allow the seedlings to settle in.
Once you see healthy new growth, begin feeding lightly if needed.
Always water before applying liquid fertilizer and follow the product instructions.
Protect Seedlings From Pests
Heat is not the only challenge.
Young fall crops are attractive to:
- Cabbage worms
- Flea beetles
- Aphids
- Slugs
- Snails
- Grasshoppers
- Deer
- Rabbits
A seedling weakened by heat can be destroyed quickly by pest damage.
Inspect plants daily, paying close attention to the undersides of leaves and the center of each plant.
Install Insect Netting Early
Insect netting works best when installed before pests arrive.
Use it over:
- Broccoli
- Cabbage
- Cauliflower
- Kale
- Collards
- Bok choy
- Napa cabbage
- Radishes
- Turnips
Check the plants and soil before covering so pests are not trapped inside.
Secure the edges with boards, soil, clips, or garden staples.
Netting can also reduce some sun intensity, but it is not a replacement for shade cloth during extreme heat.
Watch for Heat-Stress Symptoms
Common signs of heat stress include:
- Wilting during the day
- Dry or curled leaf edges
- Bleached patches
- Brown, crispy spots
- Slow growth
- Leaf drop
- Bolting
Some afternoon wilting is temporary. If the plant recovers by evening, the soil may still contain enough moisture.
If it remains wilted overnight or the soil is dry several inches down, it needs attention.
Repeated severe wilting can permanently damage young plants.
Know the Difference Between Heat Stress and Overwatering
Heat-stressed and overwatered plants can both wilt.
Before adding more water, check the soil.
A heat-stressed seedling often has:
- Dry soil
- Crispy leaf edges
- Wilting during hot periods
- Recovery after watering or cooling
An overwatered seedling may have:
- Constantly wet soil
- Yellowing leaves
- Soft stems
- Slow growth
- Wilting even though the soil is saturated
Improving drainage is essential if the soil stays soggy.
Do Not Panic Over Temporary Wilting
Even well-watered plants may wilt briefly during an extremely hot afternoon.
Plants lose water through their leaves faster than their roots can replace it.
Before watering again:
- Check the soil below the surface.
- Look for recovery in the evening.
- Confirm that drainage is working.
- Add shade if the plant is repeatedly stressed.
Watering already saturated soil can create a second problem.
Remove Damaged Leaves Carefully
Leaves that are completely burned, broken, or diseased can be removed.
However, avoid removing too much foliage from a small seedling. It needs leaves to produce energy and recover.
Leave partially healthy leaves in place unless they are spreading disease.
Wait for the plant to produce new growth before doing major cleanup.
Replace Seedlings That Cannot Recover
Not every seedling will survive.
If a plant is completely collapsed, has a damaged growing point, or continues declining despite proper care, replacing it may be the best option.
Keep a few extra seedlings as backups when possible.
You can also direct sow quick crops such as radishes, arugula, mustard greens, or baby lettuce into gaps left by failed transplants.
Growing Fall Seedlings in Containers
Containers can be helpful because they are easy to move.
You can place them:
- In morning sun
- Under afternoon shade
- Beside the house
- Under a covered patio during heat waves
- In a brighter area once temperatures cool
However, containers dry out faster than garden beds.
Use pots with drainage holes and enough soil volume to prevent rapid drying.
Small nursery cells should not be treated as long-term containers during summer heat. Up-pot seedlings if they will remain in containers for more than a short time.
A Simple Heat-Protection Routine
For newly planted fall seedlings, use this basic routine:
Morning
- Check the soil.
- Water if needed.
- Inspect for pests.
- Confirm that shade cloth is secure.
Afternoon
- Look for severe wilting.
- Check containers and small cells.
- Provide emergency shade if necessary.
Evening
- Recheck newly transplanted seedlings.
- Water only if the soil is dry.
- Adjust covers before the next day.
After a week or two, healthy seedlings should need less constant attention.
When Can You Remove the Shade?
Begin reducing shade when:
- The plant produces new growth.
- The root system is established.
- Daytime temperatures begin dropping.
- The sun becomes less intense.
- The seedling no longer wilts regularly.
Remove shade gradually rather than exposing plants to full sun all at once.
Start by giving them more morning light, then increase the total exposure over several days.
Fall Seedling Survival Checklist
Use this checklist when planting during hot weather:
- Choose heat-tolerant varieties.
- Start sensitive seeds indoors or in shade.
- Keep seed-starting mix evenly moist.
- Sow direct-seeded crops in the evening.
- Cool and water the soil before planting.
- Use temporary covers to retain moisture.
- Install shade cloth over seedlings.
- Protect plants from afternoon sun.
- Transplant in the evening or on cloudy days.
- Water before and after transplanting.
- Harden seedlings off gradually.
- Mulch after plants become established.
- Avoid strong fertilizer during extreme heat.
- Install insect netting early.
- Check seedlings at least once a day.
- Keep extra plants as backups.
My Approach in a Zone 7 Garden
In my Maryland Zone 7 garden, fall planting usually begins while summer is still very much present.
That means the first stage is not about cold protection. It is about helping cool-season vegetables survive heat.
I often start seeds in a shaded outdoor area, where they are protected from the strongest afternoon sun but still receive enough light to grow. Once they germinate, I move them gradually into brighter conditions.
When I transplant into the garden, I use shade cloth, existing summer plants, or temporary covers to protect the seedlings while their roots become established.
It takes a little more attention at first, but those same seedlings usually become much easier to manage once the temperatures begin cooling.
Final Thoughts
Growing a fall garden requires you to think one season ahead.
The vegetables may be intended for cool weather, but they often have to begin their lives during the hottest part of summer.
The key is to reduce stress rather than wait for perfect conditions.
Give seedlings shade during the hottest hours. Keep the soil consistently moist without leaving it soggy. Transplant in the evening, harden plants gradually, and protect them from pests from the beginning.
A few weeks later, the weather will begin working in your favor.
Those tiny seedlings that needed so much protection in August can become some of the most productive and flavorful plants in your autumn garden.
Frequently Asked Questions
How often should I water fall seedlings during summer?
Check the soil daily. Newly planted seedlings may need water every day during hot weather, while established plants may need less frequent but deeper watering. Always adjust for rainfall, soil type, wind, and container size.
Should fall seedlings be planted in full sun?
Most fall vegetables eventually grow best with plenty of sunlight, but young seedlings may need temporary afternoon shade during summer heat. Increase their sun exposure gradually as they establish and temperatures cool.
Can I use frost cloth as shade cloth?
Lightweight row cover may provide some sun protection, but frost cloth is designed primarily for cold protection. Shade cloth is usually more effective for reducing intense summer sunlight. Any cover must allow airflow and should not trap excessive heat.
Why are my fall seedlings wilting after transplanting?
Common causes include transplant shock, dry soil, hot sun, root disturbance, or inadequate hardening off. Water deeply, provide temporary shade, and give the plants several days to recover.
Why are my lettuce and spinach seeds not germinating?
The soil may be too warm or drying too quickly. Try starting seeds indoors, cooling the soil before planting, keeping the seedbed consistently moist, and using a temporary cover until germination begins.
Should I fertilize seedlings immediately after transplanting?
Usually not. Allow the roots to settle first. Once the plants begin producing healthy new growth, feed lightly if the soil needs additional nutrients.
How long should I shade newly transplanted seedlings?
Many seedlings benefit from three to seven days of temporary shade. Plants transplanted during extreme heat may need protection longer. Reduce the shade gradually as they establish.
Can I plant fall seedlings under tomatoes?
Yes. Healthy tomato plants can provide useful temporary shade. Make sure the seedlings are not overcrowded and will receive more light once the tomato plants are removed.
Related Articles
- How to Transition Your Garden from Summer to Fall
- Best Vegetables to Plant in Fall
- Why Fall Is One of the Best Gardening Seasons
- What to Plant in August in Zone 7
- What to Do in Your Garden in August
- When to Start a Fall Garden in Zone 7
- How to Use Shade Cloth in the Vegetable Garden
- How to Harden Off Seedlings
- How Often Should You Water Your Garden?
- How to Grow Bok Choy
- How to Grow Spinach
- How to Grow Kale
This page contains affiliate links to my brand partners like Vego Garden, GreenStalk, Walmart & Amazon at no extra cost to you.
Your support helps me create free gardening content. Thank you!


Leave a Reply